
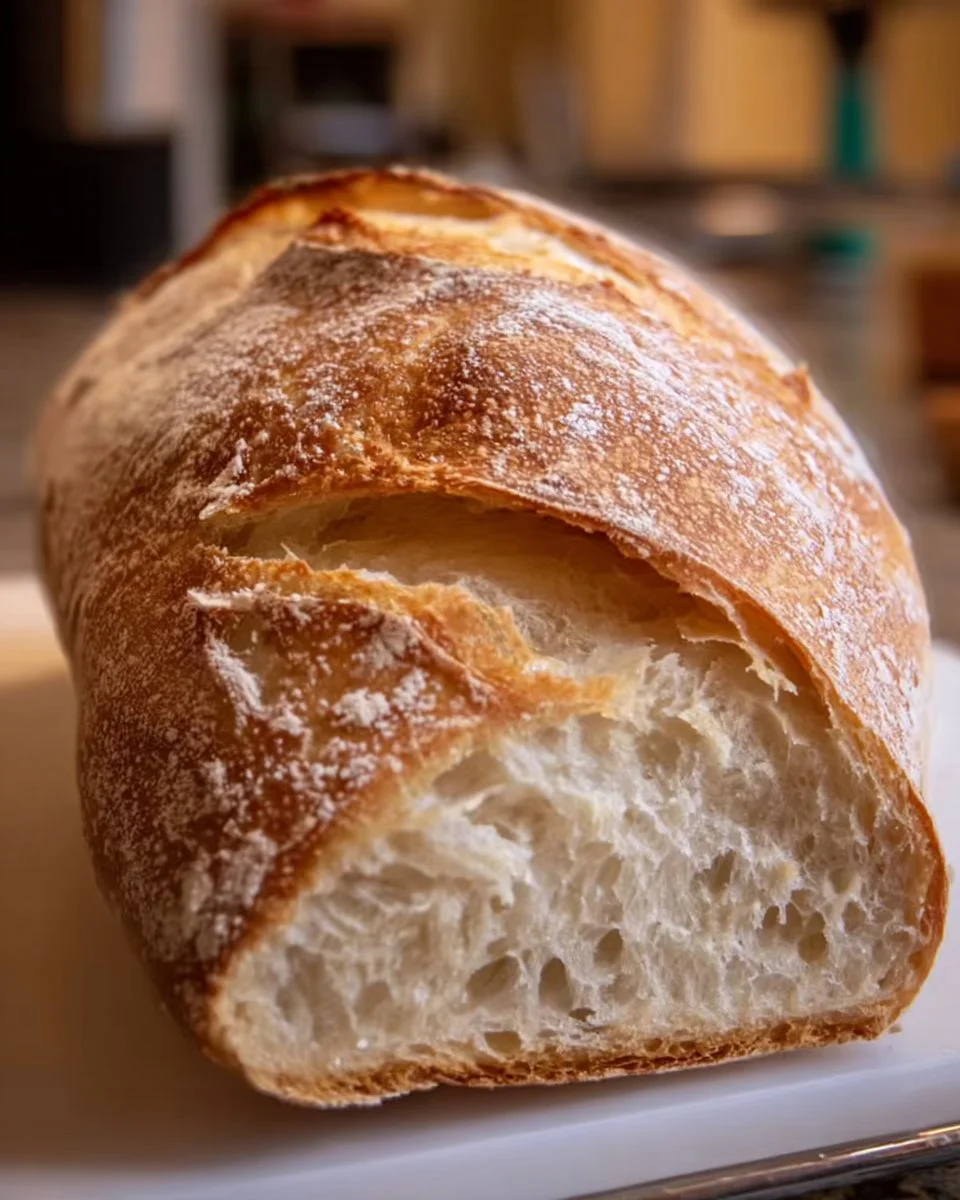
The aroma wafts through your kitchen, a heavenly blend of warm, toasted crust and the rustic tang of sourdough, beckoning you to slice into the golden loaf resting before you. Each slice marvelously reveals a texture that dances between the crispness of the crust and the soft, pillowy interior—a visual delight that promises a burst of flavor in every bite. As you pull that first slice, your senses explode with anticipation. The heat releases a gentle puff of steam, and you can’t help but inhale deeply, savoring the earthy, slightly fermented scent that speaks of lovingly nurtured wild yeast and the magic of fermentation.
Imagine butter melting into the warm embrace of that bread—a golden pat of richness flowing into every crevice. The explosion of flavor hits your palate: the slight tanginess, the nutty undertones, the satisfying chew. Toasting it until it crackles brings out a symphony of textures, providing the perfect vehicle for your favorite toppings. This is not just a loaf of bread; it’s an invitation to comfort, a warm embrace, and a culinary journey that begins in your own kitchen.
Why You’ll Love This Homemade Sourdough Bread in a Loaf Pan
Homemade Sourdough Bread showcases the perfect union of simplicity and complexity, making it a staple worth mastering. This recipe shines for its straightforward method that even novice bakers can embrace, while rewarding you with a loaf that speaks of artistry. The gentle tang from the sourdough starter harmonizes beautifully with the nutty undertones of bread flour, creating a robust flavor that complements practically any dish.
Picture serving this creation at your kitchen table, its crust still warm, the family gathered around, delighting in the hearth’s glow. Whether spread with a luscious layer of butter or standing proudly alongside your favorite soup, this bread offers endless possibilities for both casual meals and extraordinary gatherings. You can bring this loaf to life, infusing your home with warmth and creating delicious memories, making it a standout recipe you’ll want to share and savor.
Preparation Phase & Tools to Use
Embarking on your sourdough journey requires a simple yet effective set of tools that elevate your bread-making experience. A few key pieces make all the difference:
-
A Large Mixing Bowl: Essential for combining your ingredients, a sturdy bowl allows for ample space to work the dough.
-
Dough Scraper: Keeping your workspace tidy is easy with a scraper to extract the dough from the bowl and shape it without fuss.
-
Loaf Pan: This is vital for shaping your bread with straight, uniform sides, leading to a beautiful bake.
-
Kitchen Cloth: A light, breathable cloth helps retain moisture over the dough as it proves, creating a warm environment perfect for rising.
-
Digital Kitchen Scale: Accurate measurements lead to successful bakings. A scale allows you to weigh your flour, water, and starter precisely.
Preparation Tips:
- Make sure to use room temperature water to activate the starter effectively.
- Start with a clean workspace to avoid contamination. A tidy area inspires creativity!
Ingredients for Homemade Sourdough Bread in a Loaf Pan
-
500g Bread Flour: Provides the structural backbone. For a twist, consider using whole wheat flour for a heartier flavor.
-
350g Water: Hydration forms the basis of dough texture. Adjust this based on your flour type; some absorb more than others.
-
100g Sourdough Starter: This cultured mix is alive and will give your bread its signature tang. If you’re short on starter, make your own or purchase from a trusted friend or bakery.
-
10g Salt: Elevates flavor and strengthens dough. Always use high-quality sea salt or kosher salt for the best results.
How to Make Homemade Sourdough Bread in a Loaf Pan
-
Mix and Rest: In a large bowl, combine the bread flour and water until fully mixed. This step hydrates the flour. Let it rest for 30 minutes to allow gluten to develop naturally.
-
Incorporate Starter and Salt: Add your sourdough starter and salt. Mix thoroughly until a shaggy dough forms, requiring some effort but revealing beautiful texture.
-
Knead: Knead the dough for about 10 minutes on a clean surface until it becomes smooth and elastic. You’ll notice the dough transform under your hands—a satisfying process.
-
First Rise: Place the dough in a lightly greased bowl, cover it with the kitchen cloth, and let it rise at room temperature until doubled in size, which can take 4 to 6 hours depending on your environment.
-
Shape the Dough: Once risen, gently expel the air and shape the dough. Form it into a log and place it into the greased loaf pan, fitting snugly.
-
Second Rise: Cover the loaf again and let it rise for another 1 to 2 hours until you see it puffing up.
-
Preheat the Oven: As the dough rises, preheat your oven to 450°F (230°C), creating a steamy environment to achieve that crusty exterior.
-
Bake to Perfection: Bake your loaf for 30 to 35 minutes or until the crust turns a golden brown and sounds hollow when tapped. This is the moment you’ve waited for!
-
Cool & Slice: Let the loaf cool on a wire rack before slicing. This cooling period allows the moisture to settle, ensuring the perfect texture.
Chef’s Notes & Helpful Tips
-
Make-ahead Tips: You can prepare the dough and allow it to rise in the fridge overnight for a more robust flavor. Just be sure to let it come to room temperature before baking.
-
Cooking Alternatives: If you don’t have an oven, an air fryer can work wonders. Check often to prevent over-baking.
-
Customization Ideas: Try adding herbs for flavor or throw in olives, cheese, or nuts to surprise your taste buds.
Common Mistakes to Avoid
-
Skipped Autolyse: Neglecting the resting period can yield a dense loaf, so embrace that time to hydrate the flour.
-
Not Setting the Right Environment: Ensure a warm area for the dough to rise, as cold temperatures can stall fermentation and lead to disappointment.
-
Overworking the Dough: Knead just enough to develop gluten; over-kneading can lead to tough bread.
What to Serve With Homemade Sourdough Bread
-
Classic Tomato Soup: Nothing beats the delightful pairing of crusty sourdough and a warm bowl of tomato soup—a nostalgic comfort meal.
-
Savory Avocado Toast: Smash avocado onto toasted slices for a breakfast that’s creamy and satisfying with a sprinkle of chili flakes.
-
Cheese Platter: Pair with a collection of cheeses, olives, and cured meats for an elegant charcuterie board.
-
Butter and Jam: Spread a rich butter or your favorite homemade jam for a deliciously simple snack.
-
Eggs Benedict: Lay a slice under poached eggs and hollandaise sauce for a decadent brunch.
-
Beef Stew: Serve alongside a hearty stew, soaking up every flavorful drop with its chewy crust.
-
Sandwiches: Elevate your lunch game by preparing delectable sandwiches with fresh ingredients.
-
Bruschetta: Top with fresh tomatoes, basil, and balsamic for a burst of summer on your plate.
Storage & Reheating Instructions
Store your sourdough bread wrapped in a clean kitchen towel and placed in a paper bag at room temperature for 2 to 3 days, ensuring it remains fresh. For longer storage, slice the bread and pack it in an airtight container or plastic wrap before freezing. Simply toast or reheat your slices in a preheated oven at 350°F (175°C) until warmed through.
Estimated Nutrition Information
Approximate values per slice (based on 15 slices):
- Calories: 120
- Protein: 4g
- Carbohydrates: 22g
- Fat: 1g
- Fiber: 1g
Please note that these values may vary based on ingredient brands and variations in preparation.
FAQs
1. Can I use all-purpose flour instead of bread flour?
Using all-purpose flour will yield a softer dough with slightly less structure; however, it can still produce a delicious loaf with a tender crumb.
2. How do I know when my dough has risen enough?
Look for the dough to double in size and gently poke it with your finger; if it springs back slowly, it’s ready.
3. What if my starter isn’t bubbly?
Ensure your starter has been fed properly before use. If it lacks vitality, give it a refresh and try again the next day.
4. Can I add flavorings like herbs or cheese?
Absolutely! Fold in dried herbs, cheese, or chopped olives during shaping. This will create an exciting twist on your classic loaf.
5. Why did my bread turn out dense?
Dense bread may result from under-kneading, insufficient rise time, or using an inactive starter. Remember, each step matters!
Conclusion
Imagine pulling this homemade sourdough bread from your oven, a perfect loaf glistening and golden, beckoning to be sliced and savored. Let it be the centerpiece of your table, sparking joy with every bite. This recipe holds the promise of warmth and comfort, transforming mere ingredients into delectable memories. Roll up your sleeves and embrace the process—your taste buds await! Dive in and create your own piece of bread-making bliss today; you won’t regret it. Dig in, and enjoy every crusty, chewy moment of your homemade sourdough journey!
Print
Homemade Sourdough Bread in a Loaf Pan
- Prep Time: 15 minutes
- Cook Time: 35 minutes
- Total Time: 50 minutes
- Yield: 15 slices 1x
- Category: Bread
- Method: Baking
- Cuisine: American
- Diet: Vegetarian
Description
Experience the perfect blend of simplicity and complexity with homemade sourdough bread that features a crispy crust and soft interior, perfect for any meal.
Ingredients
- 500g Bread Flour
- 350g Water
- 100g Sourdough Starter
- 10g Salt
Instructions
- Mix and rest the bread flour and water in a large bowl. Let it rest for 30 minutes.
- Incorporate the sourdough starter and salt until a shaggy dough forms.
- Knead the dough for about 10 minutes until smooth and elastic.
- Place the dough in a greased bowl, cover it, and let it rise at room temperature until doubled in size (4 to 6 hours).
- Shape the dough into a log and place it in a greased loaf pan.
- Cover and let it rise again for 1 to 2 hours until puffed up.
- Preheat the oven to 450°F (230°C).
- Bake for 30 to 35 minutes until golden brown and hollow sounding.
- Let cool on a wire rack before slicing.
Notes
For a more robust flavor, consider refrigerating the dough overnight. Toasting enhances its flavor, and you can successfully use an air fryer as an alternative cooking method.
Nutrition
- Serving Size: 1 slice
- Calories: 120
- Sugar: 0g
- Sodium: 250mg
- Fat: 1g
- Saturated Fat: 0g
- Unsaturated Fat: 0g
- Trans Fat: 0g
- Carbohydrates: 22g
- Fiber: 1g
- Protein: 4g
- Cholesterol: 0mg