
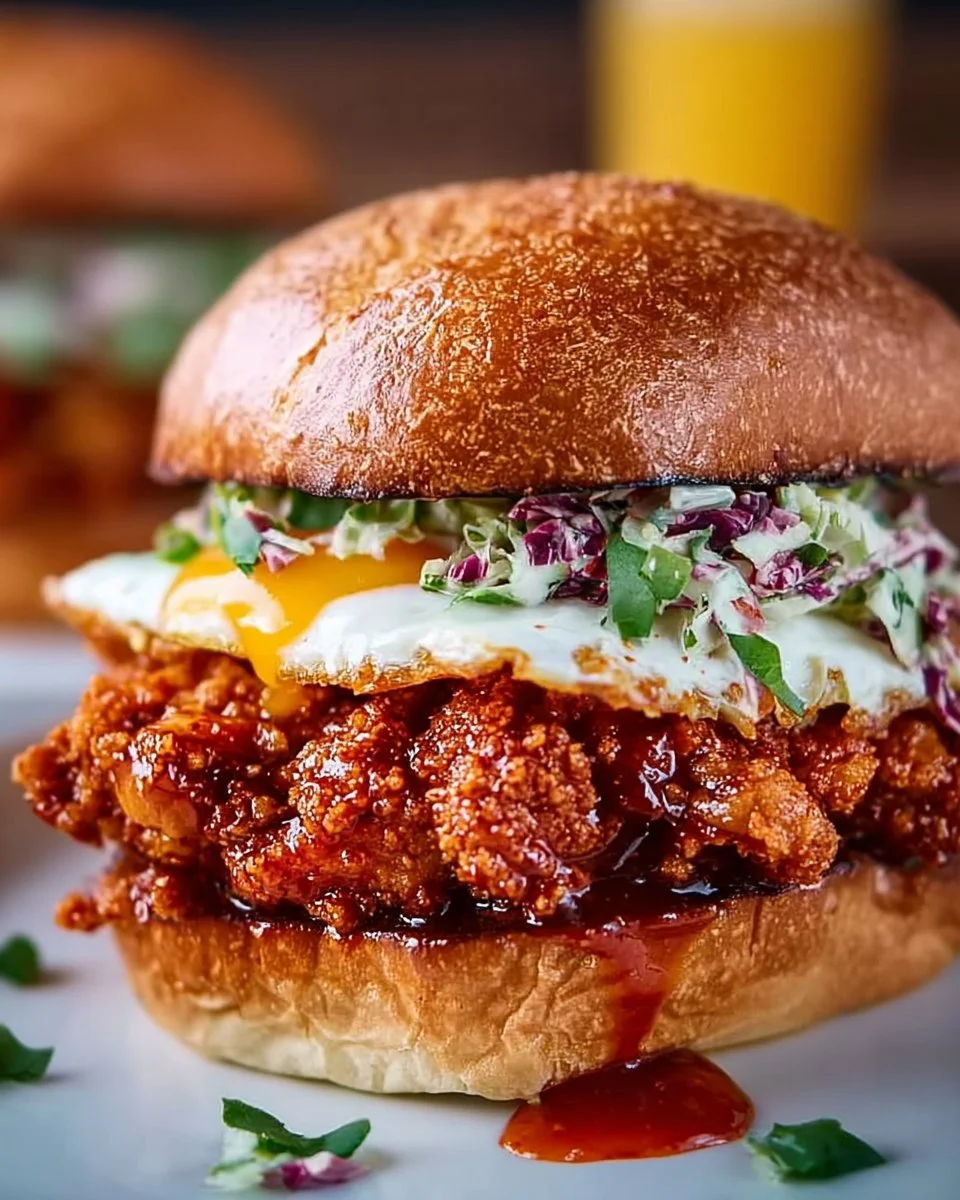
Picture this: a succulent fried chicken sandwich, crispy on the outside and tender within, mingling with an explosion of flavors that tantalize your taste buds. The rich aroma wafts through the air, drawing you closer, and as you take that first bite, the satisfying crunch serenades your senses. Each mouthful is a perfect marriage of textures—the crispiness of the chicken, the creaminess of kimchi mayonnaise, and the fresh crunch of cabbage—inviting you to indulge in a culinary adventure that’s hard to resist. This isn’t just any fried chicken sandwich; it’s a Kimchi-Brined Fried Chicken Sandwich that delivers an irresistible crunch wrapped in a burst of spicy, tangy goodness.
As the layers of taste unfold, you’ll understand why this creation has earned a special place in the hearts of those who dare to take a flavor-packed plunge. The kimchi brine seeps into the chicken, infusing it with umami richness while tenderizing every bite to perfection. Each subsequent layer—from the melty kimchi mayo to the crispy pickles—creates a harmony of flavors reminiscent of a lively culinary dance. Prepare to experience a sandwich that combines boldness with comfort, creating a dish that delights not just your palate but your soul.
Why You’ll Love This Kimchi-Brined Fried Chicken Sandwich
The Kimchi-Brined Fried Chicken Sandwich stands out for its bold flavors and perfectly balanced textures. Here’s why it’s sure to become a beloved fixture on your dining table:
- Explosive Flavor: The peppery, fermented taste of kimchi blends harmoniously with the savory chicken while the gochujang adds just the right amount of heat.
- Perfect for Any Occasion: Whether hosting a casual get-together, satisfying a late-night craving, or spoiling your family with a comforting dinner, this sandwich fits the bill beautifully.
- Hearty and Satisfying: The combination of crispy chicken, creamy mayonnaise, and crunchy cabbage offers a filling meal that’s indulgent yet balanced.
- Memorable Experience: It’s not just about eating; it’s a delightful experience that engages all your senses, making mealtime exciting and interactive.
Preparation Phase & Tools to Use
Creating your Kimchi-Brined Fried Chicken Sandwich will unfold like a culinary masterpiece, but having the right tools can elevate your cooking process:
- Large Bowl: A spacious bowl for mixing the marinade allows you to whisk ingredients thoroughly, ensuring each chicken piece gets adequately coated.
- Sealed Bag: Use a resealable bag for marinating the chicken. This allows the brine to fully penetrate the meat while saving fridge space.
- Food Processor: Perfect for blending the kimchi and mayonnaise, creating a luscious spread effortlessly.
- Dutch Oven: Ideal for frying, it maintains consistent heat—which is essential for perfect frying.
- Wire Rack: A wire rack allows your fried chicken to cool while maintaining its crispy texture.
Practical Tips: Always ensure your oil is at the right temperature to prevent soggy chicken. Use a kitchen thermometer to achieve that golden crust without overcooking.
Ingredients for Kimchi-Brined Fried Chicken Sandwich
Gather these ingredients to craft your irresistible sandwich:
- 1/2 cup (100 ml) kimchi juice
- 1 cup (225 ml) buttermilk
- 1 large egg
- 3 garlic cloves, smashed
- 1 1/2 teaspoons (6 g) kosher salt
- 1 tablespoon Tamari Gluten Free Soy Sauce
- 1/4 cup (35 g) gochugaru Korean red chili flakes
- 2 tablespoons (15 g) coarsely ground black pepper
- 6 boneless skinless chicken thighs (about 2 to 2 1/2 lb total)
- 1 cup drained kimchi, squeezed dry
- 2/3 cup (150 g) mayonnaise
- 1/2 cup (125 ml) vegetable oil
- 2 garlic cloves, smashed
- 1/4 cup (35 g) gochugaru
- 2 tablespoons (15 g) black pepper
- 2 tablespoons (25 g) gochujang
- 1 tablespoon (12 g) honey
- 2 teaspoons (10 g) Bragg Organic Apple Cider Vinegar
- 2 teaspoons (10 g) Tamari Gluten Free Soy Sauce
- 2 to 4 tablespoons water as needed
- 2 tablespoons (15 g) gochugaru
- 2 teaspoons (5 g) black pepper
- 1 tablespoon (12 g) sugar
- 2 tablespoons (15 g) black sesame seeds
- 2 teaspoons (10 g) kosher salt
- 1 1/2 cups (225 g) all-purpose flour
- 1/2 cup (75 g) cornstarch
- 2 teaspoons (8 g) baking powder
- 1/4 cup (35 g) gochugaru
- 1 tablespoon (7 g) black pepper
- 1/4 cup (35 g) black sesame seeds
- 2 tablespoons (15 g) garlic powder
- 1 1/2 teaspoons (6 g) kosher salt
- 2 quarts (2 liters) peanut oil
- 6 potato sandwich rolls, such as Martin’s Potato Rolls
- 2 cups finely shredded green cabbage
- 12 dill pickle slices
- 2 tablespoons softened butter for toasting buns
Key Ingredients to Note: The kimchi juice serves as a flavor-packed brine while the gochujang sauce gives the sandwich its delightful heat. If you prefer a milder kick, feel free to reduce the gochugaru, or substitute with your favorite hot sauce.
How to Make Kimchi-Brined Fried Chicken Sandwich
Embarking on this culinary adventure is truly rewarding; here’s how to make your sandwich step-by-step:
-
Marinate the Chicken: In a large bowl, whisk together the kimchi juice, buttermilk, egg, smashed garlic, salt, Tamari Gluten Free Soy Sauce, gochugaru, and black pepper until smooth. Add the chicken thighs, ensuring they are well coated. Transfer to a sealed bag. Refrigerate for at least 4 hours, flipping occasionally for maximum flavor infusion.
-
Prepare the Kimchi Mayonnaise: Squeeze excess liquid from the kimchi with a clean towel. Blend the kimchi with mayonnaise until creamy and smooth; refrigerate until you’re ready to assemble the sandwich.
-
Create the Chile Oil: Heat vegetable oil in a pan with smashed garlic, gochugaru, and black pepper until gently sizzling. Strain the oil into a bowl and allow it to cool.
-
Blend the Sauce: In a blender, mix together the gochujang, honey, Bragg Organic Apple Cider Vinegar, Tamari Gluten Free Soy Sauce, and mix in enough water to achieve your desired consistency. Slowly drizzle in the cooled chile oil until emulsified, and chill.
-
Make the Spice Mix: In a small bowl, mix gochugaru, black pepper, sugar, sesame seeds, and salt. This adds a zesty kick to your sandwich.
-
Prepare the Dredging Mixture: In another bowl, whisk together flour, cornstarch, baking powder, gochugaru, black pepper, sesame seeds, garlic powder, and salt. Add three tablespoons of the marinade from the chicken to the dry mix and rub together to create craggy bits for that extra crunch.
-
Fry the Chicken: Heat the peanut oil in a Dutch oven to 325°F. Remove the chicken from the marinade and dredge thoroughly in the flour mixture, pressing it firmly onto the chicken. Shake off any excess flour. Fry in batches, maintaining the oil temperature between 275°F and 300°F. Cook about 6 minutes on the first side, flip and cook an additional 4 minutes until golden brown and the internal temperature reaches 160°F. Transfer the cooked chicken to a wire rack to rest.
-
Toast the Buns: While the chicken rests, butter and toast the potato rolls until lightly golden.
-
Assemble the Sandwich: Spread a generous layer of kimchi mayonnaise on the bottom buns. Layer on the shredded cabbage and pickle slices, then place the fried chicken on top. Brush the chicken generously with the gochujang sauce, sprinkle with the spice mixture, and close the sandwich with the top bun. Serve immediately to savor the crispy, spicy, and creamy symphony of flavors.
Chef’s Notes & Helpful Tips
Ready to take your sandwich game to another level? Use these tips to make your cooking experience seamless and delightful:
- Make-ahead Tips: Marinate the chicken a day in advance for a deeper flavor. The kimchi mayonnaise can also be prepared ahead and stored in the fridge for up to three days.
- Cooking Alternatives: If you prefer a healthier cooking method, consider using an air fryer or baking the chicken at 400°F until crispy.
- Customization Ideas: Feel free to add your favorite toppings. Avocado slices or jalapeños for an extra kick make excellent additions!
Common Mistakes to Avoid
Creating a truly epic sandwich requires attention to detail. Here are common pitfalls to watch out for:
- Not Marinating Long Enough: A short marination time won’t allow the flavors to penetrate the chicken thoroughly. Aim for at least 4 hours, or even overnight, if your schedule allows.
- Oil Temperature Fluctuations: Keep the oil temperature steady. If it’s too hot, the chicken will burn; too cool, and it will be greasy. Use a thermometer for best results.
- Skipping the Drying Step for Kimchi: Failing to squeeze out excess liquid from the kimchi before blending it into the mayo can make your mixture runny. Always drain to achieve a creamy consistency.
What to Serve With Kimchi-Brined Fried Chicken Sandwich
Pair your sandwich with these delightful sides that elevate your meal:
- Sweet Potato Fries: Their natural sweetness balances the spicy crunch of the sandwich beautifully.
- Coleslaw: A tangy, crunchy slaw complements the flavors while providing a fresh crunch.
- Kimchi Fried Rice: An excellent way to use leftover kimchi, this dish echoes the flavors of your sandwich.
- Pickled Vegetables: Their sharpness adds brightness, contrasting perfectly with the heavy elements of your meal.
- Beer or Asian-inspired Cocktails: Pair with a crisp lager or a refreshing cocktail to wash down the spice and crunch.
- Roasted Brussels Sprouts: The earthy flavors enhance the overall taste experience while keeping it healthier.
Storage & Reheating Instructions
To savor your Kimchi-Brined Fried Chicken Sandwich later:
- Fridge: Store leftovers in an airtight container for up to 2 days. The sandwich may become soggy, so separate components when storing.
- Freezing: For longer storage, freeze the cooked chicken. Place it between layers of parchment paper in an airtight container for up to a month.
- Reheating: For the crispiest results, reheat fried chicken in an oven set to 375°F for about 10-15 minutes until heated through. Reassemble with fresh buns.
Estimated Nutrition Information
While every bite feels indulgent, here’s a rough estimate of nutrition per sandwich:
- Calories: 750
- Protein: 35g
- Carbohydrates: 45g
- Fat: 45g
- Fiber: 3g
Note: Values may vary based on ingredient specifics and portion sizes.
FAQs
1. Can I use chicken breasts instead of thighs?
Absolutely! Chicken breasts can be used for a leaner option, but remember they may dry out more easily. Adjust cooking time accordingly to ensure they stay juicy.
2. How spicy is the sandwich?
While the recipe combines various spicy elements, you can easily adjust the heat level. Reduce the gochugaru or omit gochujang if you prefer a mild sandwich.
3. Can I use regular soy sauce instead of Tamari?
Yes, regular soy sauce is a direct substitute. Just be mindful of gluten content if that’s a concern.
4. What’s the best way to store leftover kimchi?
Keep leftover kimchi in a sealed container in the refrigerator. It will continue to ferment, enhancing its flavor over time.
5. Can I make the sauce vegan?
Yes! You can replace mayonnaise with a vegan alternative, and use agave syrup instead of honey to contribute sweetness without animal products.
Take a moment to revel in the exceptional flavors of the Kimchi-Brined Fried Chicken Sandwich. This is not just a meal; it’s an experience that brings joy to the table, igniting conversations, and satisfying cravings. Embrace your inner chef, gather your loved ones, and dive into this culinary adventure. You won’t regret discovering a sandwich that transforms everyday dining into extraordinary moments. So lace up your apron, roll up your sleeves, and get ready to indulge in this feast that captivates every sense—one crunchy, savory bite at a time.
Print
Kimchi-Brined Fried Chicken Sandwich
- Prep Time: 240 minutes
- Cook Time: 20 minutes
- Total Time: 260 minutes
- Yield: 6 servings 1x
- Category: Main Course
- Method: Frying
- Cuisine: Korean-American
- Diet: Poultry
Description
A delicious fried chicken sandwich brined in kimchi for bold flavors and a satisfying crunch, topped with kimchi mayonnaise and fresh vegetables.
Ingredients
- 1/2 cup (100 ml) kimchi juice
- 1 cup (225 ml) buttermilk
- 1 large egg
- 3 garlic cloves, smashed
- 1 1/2 teaspoons (6 g) kosher salt
- 1 tablespoon Tamari Gluten Free Soy Sauce
- 1/4 cup (35 g) gochugaru Korean red chili flakes
- 2 tablespoons (15 g) coarsely ground black pepper
- 6 boneless skinless chicken thighs (about 2 to 2 1/2 lb total)
- 1 cup drained kimchi, squeezed dry
- 2/3 cup (150 g) mayonnaise
- 1/2 cup (125 ml) vegetable oil
- 2 garlic cloves, smashed
- 1/4 cup (35 g) gochugaru
- 2 tablespoons (15 g) black pepper
- 2 tablespoons (25 g) gochujang
- 1 tablespoon (12 g) honey
- 2 teaspoons (10 g) Bragg Organic Apple Cider Vinegar
- 2 teaspoons (10 g) Tamari Gluten Free Soy Sauce
- 2 to 4 tablespoons water as needed
- 2 tablespoons (15 g) gochugaru
- 2 teaspoons (5 g) black pepper
- 1 tablespoon (12 g) sugar
- 2 tablespoons (15 g) black sesame seeds
- 2 teaspoons (10 g) kosher salt
- 1 1/2 cups (225 g) all-purpose flour
- 1/2 cup (75 g) cornstarch
- 2 teaspoons (8 g) baking powder
- 1/4 cup (35 g) gochugaru
- 1 tablespoon (7 g) black pepper
- 1/4 cup (35 g) black sesame seeds
- 2 tablespoons (15 g) garlic powder
- 1 1/2 teaspoons (6 g) kosher salt
- 2 quarts (2 liters) peanut oil
- 6 potato sandwich rolls, such as Martin’s Potato Rolls
- 2 cups finely shredded green cabbage
- 12 dill pickle slices
- 2 tablespoons softened butter for toasting buns
Instructions
- Marinate the chicken: In a large bowl, whisk together the kimchi juice, buttermilk, egg, smashed garlic, salt, Tamari Gluten Free Soy Sauce, gochugaru, and black pepper until smooth. Add the chicken thighs, ensuring they are well coated. Transfer to a sealed bag. Refrigerate for at least 240 minutes, flipping occasionally for maximum flavor infusion.
- Prepare the kimchi mayonnaise: Squeeze excess liquid from the kimchi with a clean towel. Blend the kimchi with mayonnaise until creamy and smooth; refrigerate until you’re ready to assemble the sandwich.
- Create the chile oil: Heat vegetable oil in a pan with smashed garlic, gochugaru, and black pepper until gently sizzling. Strain the oil into a bowl and allow it to cool.
- Blend the sauce: In a blender, mix together the gochujang, honey, Bragg Organic Apple Cider Vinegar, Tamari Gluten Free Soy Sauce, and mix in enough water to achieve your desired consistency. Slowly drizzle in the cooled chile oil until emulsified, and chill.
- Make the spice mix: In a small bowl, mix gochugaru, black pepper, sugar, sesame seeds, and salt. This adds a zesty kick to your sandwich.
- Prepare the dredging mixture: In another bowl, whisk together flour, cornstarch, baking powder, gochugaru, black pepper, sesame seeds, garlic powder, and salt. Add three tablespoons of the marinade from the chicken to the dry mix and rub together to create craggy bits for that extra crunch.
- Fry the chicken: Heat the peanut oil in a Dutch oven to 325°F. Remove the chicken from the marinade and dredge thoroughly in the flour mixture, pressing it firmly onto the chicken. Shake off any excess flour. Fry in batches, maintaining the oil temperature between 275°F and 300°F. Cook about 6 minutes on the first side, flip and cook an additional 4 minutes until golden brown and the internal temperature reaches 160°F. Transfer the cooked chicken to a wire rack to rest.
- Toast the buns: While the chicken rests, butter and toast the potato rolls until lightly golden.
- Assemble the sandwich: Spread a generous layer of kimchi mayonnaise on the bottom buns. Layer on the shredded cabbage and pickle slices, then place the fried chicken on top. Brush the chicken generously with the gochujang sauce, sprinkle with the spice mixture, and close the sandwich with the top bun. Serve immediately to savor the crispy, spicy, and creamy symphony of flavors.
Notes
Marinate chicken a day in advance for the best flavor. Consider using an air fryer for a healthier version.
Nutrition
- Serving Size: 1 sandwich
- Calories: 750
- Sugar: 10g
- Sodium: 1200mg
- Fat: 45g
- Saturated Fat: 10g
- Unsaturated Fat: 25g
- Trans Fat: 0g
- Carbohydrates: 45g
- Fiber: 3g
- Protein: 35g
- Cholesterol: 170mg