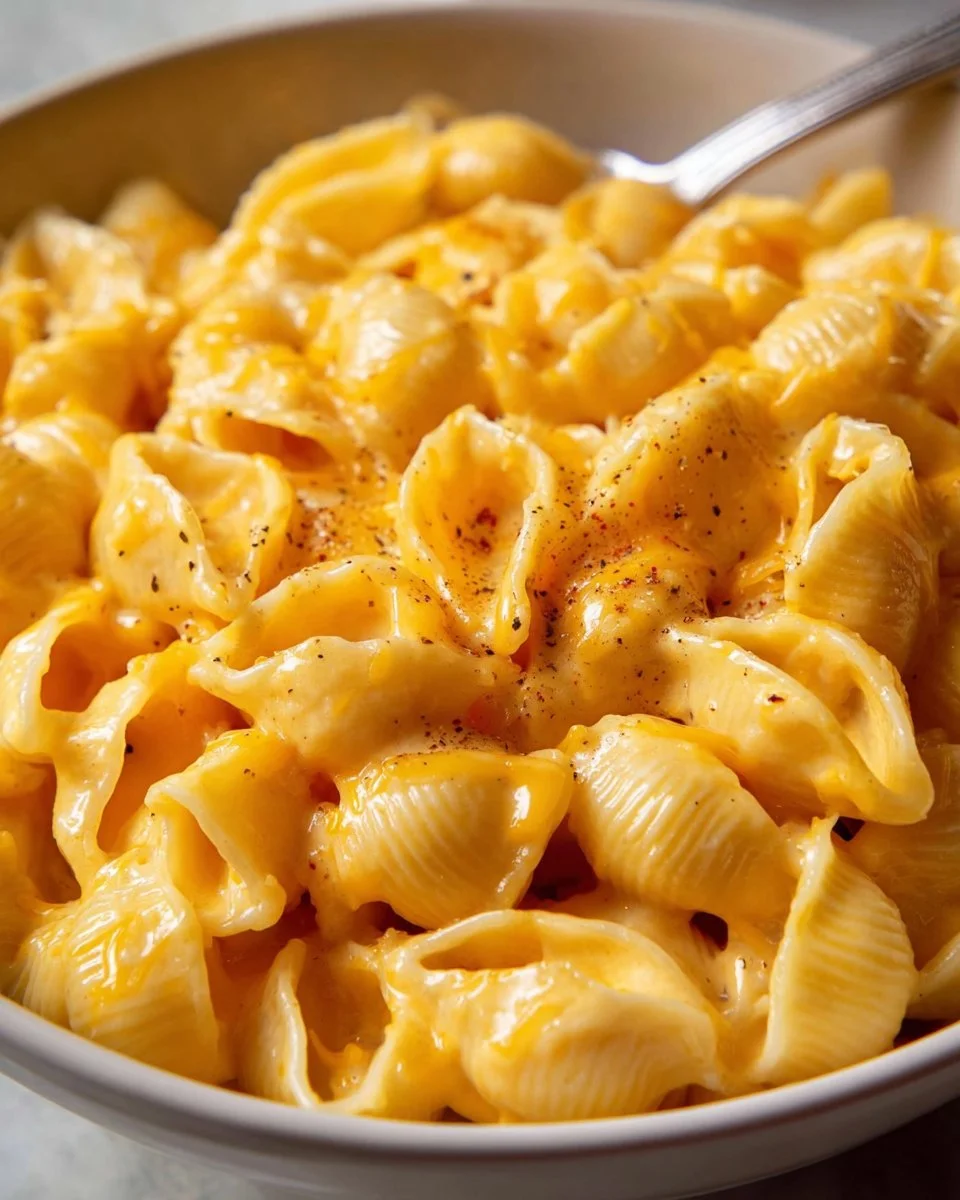
Every time the cool air of autumn ushers in sweater season, the longing for comfort food finds a new place in my heart. Imagine a cozy evening, gathering with loved ones around a table, laughter bubbling alongside the aroma of something special simmering on the stovetop. That’s the magic of Homemade Shells and Cheese—a dish that captures the essence of home, pulling at your senses with creamy goodness and rich flavors. Each bite envelops you in a blanket of warmth, creating an experience that transcends mere eating; it becomes a feast for the soul.
As you stir together those smooth, melted cheddar cheese and fluffy pasta shells, anticipation builds. The moment you take that first bite, the pillowy pasta practically dances in your mouth, the velvety sauce coating each shell with its luscious richness. That delightful stretch of melted cheese, transformed into gooey perfection, sends your taste buds into a frenzy with its sharp yet comforting flavor. When it’s fresh from the stovetop, your kitchen becomes a haven of bliss, filled with a mouthwatering aroma that beckons everyone to the table.
Why You’ll Love This Homemade Shells and Cheese
Homemade Shells and Cheese isn’t just a dish; it’s a comforting embrace on a plate. The combination of tender pasta and a creamy cheese sauce creates a harmonious symphony of textures and flavors. This meal is incredibly satisfying, making it perfect for cozy dinners on chilly nights, casual family gatherings, or even as a hearty side dish at festive celebrations.
This recipe stands out because of its balance; the slight sharpness of cheddar accentuates the comforting softness of the pasta, while hints of garlic and onion elevate it from the ordinary. Plus, it comes together quickly, making it a go-to choice when you want to impress without spending hours in the kitchen. Not to mention, the creamy goodness is entirely customizable, inviting you to add your favorite ingredients and create a unique dish every time!
Preparation Phase & Tools to Use
Before diving into this delicious recipe, take a moment to gather your tools. This makes the cooking process smooth and enjoyable.
- Large Pot: Choose one with enough volume for boiling pasta. The larger the pot, the less likely you are to have pasta stick together.
- Saucepan: A medium-sized saucepan works best for making your cheese sauce. It allows for even heat distribution.
- Whisk: A good whisk is essential for creating a smooth cheese sauce. It prevents lumps and helps incorporate the cheese evenly.
- Colander: After boiling the pasta, a colander quickly drains water without losing any precious shells.
Preparation Tips:
- Always have your ingredients measured out and ready to go before you start cooking. This makes the whole process faster and more enjoyable.
- Preheat your saucepan on medium heat to ensure your roux develops a rich flavor.
Ingredients for Homemade Shells and Cheese
- 2 cups pasta shells: These little pockets are perfect for holding that gorgeous cheese sauce.
- 2 tablespoons butter: Adds richness and flavor to the roux.
- 2 tablespoons all-purpose flour: This thicken agent makes your sauce creamy.
- 2 cups milk: Choose whole for a richer sauce, or any milk of choice.
- 2 cups shredded cheddar cheese: The star of the show; sharp cheese adds depth and flavor.
- 1/2 teaspoon garlic powder: Infuses a savory complexity into the dish.
- 1/2 teaspoon onion powder: Complements the garlic beautifully.
- Salt and pepper to taste: Elevates the flavors and balances the richness.
Feel free to switch up cheeses. Gouda, mozzarella, or pepper jack add intrigue and personal flair!
How to Make Homemade Shells and Cheese
-
Cook the pasta shells: Bring a large pot of salted water to a rolling boil. Add the pasta shells and cook according to package instructions until al dente. Drain the shells in a colander and set aside.
-
Melt the butter: In a medium saucepan, warm the butter over medium heat. Allow it to melt completely, letting its rich aroma fill your kitchen.
-
Whisk in the flour: Once the butter is melted, whisk in the flour, stirring constantly for about one minute to create a roux. This forms the base of your creamy sauce.
-
Gradually add the milk: Slowly pour in the milk while whisking continuously to avoid lumps. Keep whisking as it thickens to a smooth consistency, about 3-5 minutes.
-
Stir in the cheese: Remove the saucepan from heat and add the shredded cheddar cheese, garlic powder, onion powder, salt, and pepper. Whisk until the cheese melts and the sauce is silky.
-
Combine with pasta: Gently fold the cheese sauce into the cooked pasta shells. Ensure every shell is coated with that luscious cheese sauce.
-
Serve warm: Scoop generous portions into bowls, sprinkle with a touch more cheese if you desire, and enjoy the comforting delight.
Chef’s Notes & Helpful Tips
-
Make-ahead tips: Prepare the cheese sauce in advance and store it in the refrigerator. When ready to serve, simply reheat and stir in freshly cooked pasta.
-
Cooking alternatives: For an air-fried twist, consider using an air fryer for crispy edges. Simply transfer your combined shells and cheese to an air fryer-safe dish, top with breadcrumbs and cheese, and air fry until golden!
-
Customization ideas: Add cooked diced bacon, sautéed vegetables, or even a dash of hot sauce for a personal touch.
Common Mistakes to Avoid
Creating a flawless Homemade Shells and Cheese requires attention. Here are some common missteps:
-
Overcooking the pasta: Ensure you follow package directions for al dente pasta to avoid mushy shells that can’t hold the sauce.
-
Neglecting the roux: Don’t rush the roux step. It provides necessary flavor—if not properly cooked, the sauce may taste pasty.
-
Not whisking enough: Whisk constantly while adding milk to avoid lumps. If you don’t, you might be stuck with an unpleasant texture.
What to Serve With Homemade Shells and Cheese
The beauty of Homemade Shells and Cheese lies in its versatility. Pair this delectable dish with:
- Roasted vegetables: The crispiness from Brussels sprouts or broccoli adds delightful contrast.
- Grilled chicken: Juicy chicken served alongside enriches the creamy dish and brings protein to the plate.
- Garlic bread: A crunchy, buttery slice of garlic bread begs to be dipped into that cheesy goodness.
- Salad: A fresh, zesty side salad refreshes the palate while complementing the richness of the cheese.
- Sautéed greens: Spinach or kale sautéed in garlic brings healthy depth and flavors.
- Crusty bread: Perfect for scooping up the last bites from your bowl.
Storage & Reheating Instructions
Leftover Homemade Shells and Cheese? No problem! Store it in an airtight container in the fridge for up to three days. You can freeze it as well, but I recommend doing so without the cheese sauce mixed in for optimal texture. When you’re ready to enjoy again, simply reheat in the microwave or on the stovetop. Add a splash of milk while reheating to revive its creamy texture.
Estimated Nutrition Information
- Calories: Approximately 400
- Protein: 20g
- Fat: 20g
- Carbohydrates: 40g
Note: Values can vary based on specific ingredients and portion sizes.
FAQs
Can I make this recipe gluten-free?
Absolutely! Swap out standard pasta for gluten-free shells, and use a gluten-free flour blend for the roux.
What cheese works best for this dish?
While cheddar is traditional, feel free to mix it up! A combination of Gouda, Swiss, or even mozzarella can create a delightful flavor profile.
Can I add protein to this?
You bet! Diced cooked chicken, crumbled sausage, or even shelled shrimp stir in wonderfully for a hearty meal.
How can I make it spicier?
Add a dash of cayenne pepper to the cheese sauce or sprinkle some red pepper flakes on top before serving!
Can I use milk alternatives?
Yes, almond or oat milk can replace dairy milk. The flavor may change slightly, but it remains delicious!
Conclusion
So there you have it—Homemade Shells and Cheese made easy, rich, and oh-so-satisfying. This dish not only nourishes the body but also warms the heart and soul. Whether it’s for a family dinner or a comforting night in, each creamy, cheesy bite promises to ignite joy. Don’t hesitate—gather your ingredients and start creating this delightful masterpiece today. Your taste buds will thank you!
Print
Homemade Shells and Cheese
- Prep Time: 10 minutes
- Cook Time: 15 minutes
- Total Time: 25 minutes
- Yield: 4 servings 1x
- Category: Main Course
- Method: Stovetop
- Cuisine: American
- Diet: Vegetarian
Description
A comforting and creamy dish of pasta shells coated in a rich cheddar cheese sauce, perfect for cozy evenings.
Ingredients
- 2 cups pasta shells
- 2 tablespoons butter
- 2 tablespoons all-purpose flour
- 2 cups milk
- 2 cups shredded cheddar cheese
- 1/2 teaspoon garlic powder
- 1/2 teaspoon onion powder
- Salt and pepper to taste
Instructions
- Cook the pasta shells: Bring a large pot of salted water to a rolling boil. Add the pasta shells and cook according to package instructions until al dente. Drain the shells in a colander and set aside.
- Melt the butter: In a medium saucepan, warm the butter over medium heat until melted.
- Whisk in the flour: Once melted, whisk in the flour for about one minute to create a roux.
- Gradually add the milk: Pour in the milk while whisking continuously to avoid lumps, and cook until thickened, about 3-5 minutes.
- Stir in the cheese: Remove from heat and add the cheddar cheese, garlic powder, onion powder, salt, and pepper. Whisk until smooth.
- Combine with pasta: Fold the cheese sauce into the cooked pasta shells until well coated.
- Serve warm: Portion into bowls, sprinkle with additional cheese if desired, and enjoy.
Notes
Make the cheese sauce ahead of time and reheat with freshly cooked pasta. For a crispy texture, use an air fryer with breadcrumbs on top.
Nutrition
- Serving Size: 1 serving
- Calories: 400
- Sugar: 5g
- Sodium: 600mg
- Fat: 20g
- Saturated Fat: 10g
- Unsaturated Fat: 8g
- Trans Fat: 0g
- Carbohydrates: 40g
- Fiber: 2g
- Protein: 20g
- Cholesterol: 60mg