
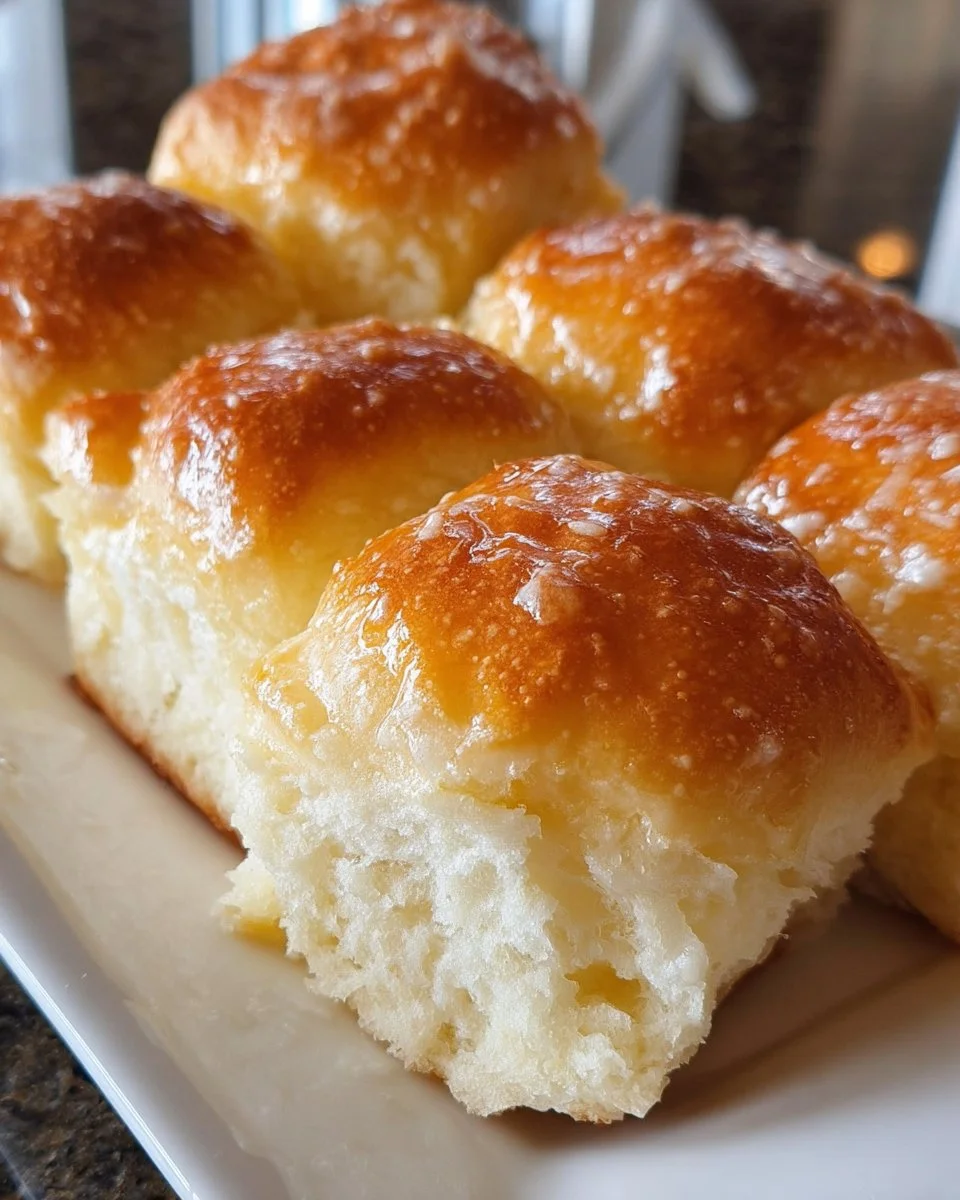
There’s something undeniably magical about the aroma of freshly baked bread wafting through your home. As you wander into the kitchen, the scent wraps around you like a warm embrace, inviting you to take a moment and savor the anticipation of a delightful treat. But wait – this isn’t just any bread. These homemade potato bread rolls promise more than just a delicious bite; they offer a soft, pillowy texture with the kind of buttery richness that elevates every meal into a celebration.
Imagine sinking your teeth into one of these rolls, the crust just slightly crisp, giving way to a creamy, warm interior that melts in your mouth. Each bite releases a comforting wave of flavor that tastes like home. The sweetness of the blend dances with the light savory notes, creating a perfect harmony that will bring your family to the table in search of seconds, or even thirds. Every roll joins your feast with a promise of comfort, nostalgia, and warmth, making them the ideal companion for any occasion.
Why You’ll Love This Homemade Potato Bread Rolls
You’ll find these potato bread rolls to be an absolute game-changer at any gathering. First and foremost, their flavor is delightful — the combination of mashed potatoes and butter gives them a richness that plain bread can’t compete with. They possess an extraordinary softness, ensuring each roll becomes a favorite amongst even the pickiest of eaters. Furthermore, these rolls are incredibly versatile. Serve them at family dinners, holiday feasts, or just as a simple snack with butter. They don’t just shine on the side of your plate; they can be the star of the show!
Beyond flavor and texture, make-ahead options abound. You can prepare the dough in advance, freeze the rolls before they rise, or even create a batch to bake fresh when you have guests. There’s a sense of satisfaction that accompanies making your own bread, and sharing these scrumptious rolls will have your friends asking for your secrets, which you can simply share with a smile.
Preparation Phase & Tools to Use
Before diving into this delicious endeavor, gather a few essential tools that will elevate your bread-making experience:
- Mixing Bowls: A sturdy mixing bowl ensures that all your ingredients blend harmoniously.
- Whisk: Use this to combine dry ingredients effectively.
- Rolling Pin: Perfect for shaping your dough as it rises.
- Baking Sheet: Opt for one lined with parchment paper to make cleanup a breeze.
- Kitchen Towel: Keep your dough covered as it rises; warmth is crucial for a fluffy bread roll.
When preparing your ingredients, keep everything within arm’s reach. Measure out your ingredients ahead of time, ensuring that you make the most of your mixing experience without unnecessary interruptions. Having everything ready allows you to immerse yourself fully in the deliciousness of baking.
Ingredients for Homemade Potato Bread Rolls
Gather these wholesome ingredients to create delightful potato bread rolls:
- 2 cups mashed potatoes (leftover or freshly made)
- 1/2 cup milk, warmed
- 1/4 cup butter, melted
- 1 tablespoon sugar
- 1 teaspoon salt
- 2 teaspoons active dry yeast
- 4 cups all-purpose flour
- 1 egg (optional, for a golden egg wash)
Each ingredient plays a critical role in the final product. The mashed potatoes add moisture and a lovely richness to the rolls, while milk and melted butter contribute to a soft texture. Active dry yeast is essential for that light, fluffy rise; it activates and builds air pockets to create a heavenly bounce. Feel free to experiment with substitutions like almond milk for a dairy-free option or whole wheat flour for added nutrition.
How to Make Homemade Potato Bread Rolls
- Mix Ingredients: In a large mixing bowl, combine the mashed potatoes, warm milk, melted butter, sugar, and salt. Blend until creamy and well combined.
- Activate the Yeast: Gently sprinkle the active dry yeast over the mixture and allow it to sit for about 5 minutes. This wakes up the yeast, ensuring your rolls rise beautifully.
- Add Flour Gradually: Start adding flour one cup at a time. Mix gently after each addition until a soft dough begins to form.
- Knead the Dough: Transfer the dough onto a floured surface. Knead it for approximately 5-7 minutes until it becomes smooth and elastic. This step is crucial for gluten development!
- First Rise: Place the kneaded dough in a greased bowl, cover it, and let it rise in a warm area until it doubles in size, about an hour. This is the moment when magic happens, filling the air with tantalizing scents.
- Shape the Rolls: Once risen, punch the dough down gently and shape it into rolls about the size of a golf ball. Don’t worry about perfection; a rustic look adds charm!
- Second Rise: Arrange the rolls on a parchment-lined baking sheet. Cover and let them rise for another 30 minutes. This gives them that hearty, fluffy nature we love.
- Preheat the Oven: While the rolls rise, preheat your oven to 375°F (190°C) to ensure thorough cooking.
- Egg Wash: Brush the tops of the rolls with beaten egg for a gorgeous golden finish, if desired.
- Bake: Place your rolls in the oven and bake for 20-25 minutes, or until they turn golden brown. The sight of these beauties emerging from the oven will take your breath away!
Chef’s Notes & Helpful Tips
- Make-Ahead: You can prepare the dough and freeze it before the first rise. Simply thaw and shape when you’re ready to bake!
- Air Fryer Alternative: For a unique twist, try baking smaller rolls in an air fryer at 350°F (175°C) for around 10-15 minutes. They develop a delightful crust while remaining soft inside.
- Customization Ideas: Add herbs like rosemary or thyme for a fragrant note, or cheese for added flavor. You can even mix in roasted garlic for an incredible twist!
Common Mistakes to Avoid
Baking bread can be a bit tricky, so here are common pitfalls to sidestep:
- Not Checking Yeast Freshness: Always ensure your yeast is active before using it. If in doubt, do a quick test by mixing it with warm water and a little sugar.
- Kneading Too Little or Too Much: You want a balance. Knead until elastic but avoid overdoing it to keep the rolls soft.
- Skipping the Second Rise: Don’t rush the second rise! It develops flavor and texture that make all the difference.
What to Serve With Homemade Potato Bread Rolls
These potato bread rolls can elevate nearly any dish. Consider pairing them with:
- Thick soups: The rolls soak up every drop of creamy potato or chunky vegetable bisque.
- Roast chicken: Fluffy rolls complement moist, herb-crusted chicken beautifully.
- Chili: Their softness contrasts wonderfully with the rich, spicy notes of chili.
- Salads: They provide a great filler alongside a fresh garden salad.
- Stews: Sopping up hearty beef or vegetable stew makes each bite indulgent.
- Butter and Jam: A simple, sweet treat at breakfast or afternoon tea.
- Casseroles: Serve alongside your favorite cheesy baked dish for a comforting meal.
- Cheese Platter: Perfect for nibbling with various cheeses on relaxed evenings.
Storage & Reheating Instructions
Store leftover potato bread rolls in an airtight container at room temperature for up to 2 days. If you need to keep them longer, freeze them by placing the cooled rolls in a freezer-safe bag for up to a month. To reheat, simply pop them in the oven at 350°F (175°C) for about 10 minutes or until warmed through. You’ll be surprised at how fresh they taste!
Estimated Nutrition Information
This recipe yields around 12 rolls, each having approximately:
- Calories: 160
- Protein: 4g
- Carbohydrates: 30g
- Fat: 4g
- Fiber: 1g (values are approximate and may vary based on ingredient choices)
FAQs
1. Can I use sweet potatoes instead of regular potatoes?
Absolutely! Sweet potatoes will impart a lovely sweetness and beautiful color to the rolls.
2. What’s the best way to reheat leftover rolls?
For the best texture, reheat them in the oven rather than the microwave. A few minutes at 350°F will revitalize their softness.
3. Can I make these rolls gluten-free?
Yes! Substitute with a gluten-free flour blend suitable for baking. Ensure to add a binder like xanthan gum if your blend doesn’t already include it.
4. What if my dough doesn’t rise?
Ensure your yeast is fresh and that you’re letting the dough rise in a warm environment free from drafts.
5. How can I adjust the recipe for larger batches?
Simply double or triple the quantities as needed, but be mindful to allow sufficient room for the dough to rise.
Conclusion
Crafting these homemade potato bread rolls leads to an experience filled with warmth, delight, and an unforgettable taste that beckons everyone to gather ‘round the table. These rolls offer more than just nourishment; they provide a chance to make memories and enjoy the simple pleasures of life. Whether imaginations roam to family dinners or cozy nights in, there is nothing quite like sharing freshly baked bread. So roll up your sleeves, embrace the magic of baking, and dive into this warm embrace of comfort food. Your kitchen deserves the scent of homemade potato bread rolls. Go ahead, give it a try, and prepare yourself for the compliments that will surely follow!
Print
Homemade Potato Bread Rolls
- Prep Time: 20 minutes
- Cook Time: 25 minutes
- Total Time: 45 minutes
- Yield: 12 rolls 1x
- Category: Bread
- Method: Baking
- Cuisine: American
- Diet: Vegetarian
Description
Delightful potato bread rolls with a soft, pillowy texture and buttery richness, perfect for any meal.
Ingredients
- 2 cups mashed potatoes (leftover or freshly made)
- 1/2 cup milk, warmed
- 1/4 cup butter, melted
- 1 tablespoon sugar
- 1 teaspoon salt
- 2 teaspoons active dry yeast
- 4 cups all-purpose flour
- 1 egg (optional, for a golden egg wash)
Instructions
- Mix ingredients: In a large mixing bowl, combine the mashed potatoes, warm milk, melted butter, sugar, and salt. Blend until creamy and well combined.
- Activate the yeast: Gently sprinkle the active dry yeast over the mixture and allow it to sit for about 5 minutes.
- Add flour gradually: Start adding flour one cup at a time. Mix gently after each addition until a soft dough begins to form.
- Knead the dough: Transfer the dough onto a floured surface. Knead it for approximately 5-7 minutes until it becomes smooth and elastic.
- First rise: Place the kneaded dough in a greased bowl, cover it, and let it rise in a warm area until it doubles in size, about 60 minutes.
- Shape the rolls: Once risen, punch the dough down gently and shape it into rolls about the size of a golf ball.
- Second rise: Arrange the rolls on a parchment-lined baking sheet. Cover and let them rise for another 30 minutes.
- Preheat the oven: While the rolls rise, preheat your oven to 375°F (190°C).
- Egg wash: Brush the tops of the rolls with beaten egg for a gorgeous golden finish, if desired.
- Bake: Place your rolls in the oven and bake for 20-25 minutes, or until they turn golden brown.
Notes
Make-ahead option available; dough can be prepared in advance and frozen before first rise.
Nutrition
- Serving Size: 1 roll
- Calories: 160
- Sugar: 1g
- Sodium: 200mg
- Fat: 4g
- Saturated Fat: 2g
- Unsaturated Fat: 2g
- Trans Fat: 0g
- Carbohydrates: 30g
- Fiber: 1g
- Protein: 4g
- Cholesterol: 20mg