
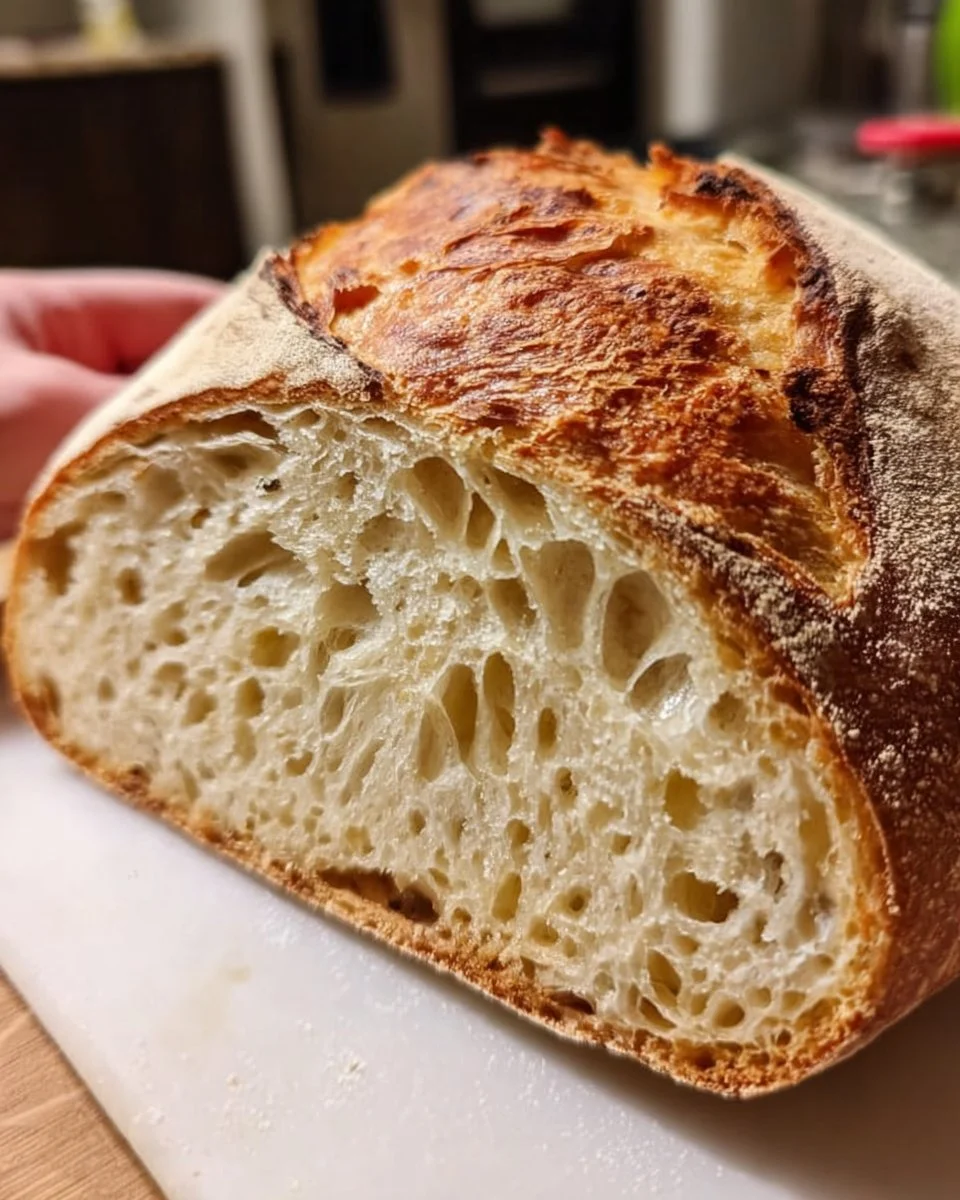
The warm, inviting aroma of freshly baked bread wafts through your kitchen, evoking a sense of comfort and nostalgia. You pull a golden-brown loaf from the oven, marveling at its beautifully crisp crust and lightly hissing steam as it cools. As you slice through the bread, the crackle of the crust gives way to a pillowy, airy interior, both subtle and savory. Each bite showcases the tangy notes of the sourdough, perfectly accentuated by a deeply set crust that offers a satisfying crunch. This is no ordinary loaf; it’s a masterpiece of flavor and texture, embodying the soulful essence of homemade bread.
What if I told you that achieving this delightful experience doesn’t require an overnight fermentation process or mastery over elusive techniques? With the no-bulk fermentation method, you can create a stunning sourdough bread that dazzles the senses in just a few hours. Imagine enjoying warm, crusty slices slathered with creamy butter or drizzled with golden olive oil, making your taste buds dance with delight. The journey from flour to oven feels like a warm embrace, turning your kitchen into a haven of heartwarming scents and flavors that invite family and friends to gather around the table.
Why You’ll Love This No-Bulk-Fermentation Sourdough Bread
This no-bulk-fermentation sourdough bread stands out for a multitude of reasons. First and foremost, the flavor it delivers is remarkable. The tangy complexity of your sourdough starter dances elegantly through each bite, making this bread a perfect canvas for various toppings or a decadent base for sandwiches. The satisfaction of slicing into your own homemade loaf, with the opaque crumb and exquisite crust, brings a sense of achievement unmatched by store-bought bread.
Moreover, this bread shines in its versatility. Enjoy it with breakfast, served warm alongside your favorite soup, or at an evening gathering, exquisite enough to impress any guest. Best of all, this recipe eliminates long fermenting times, allowing you to bake artisan-quality bread in less than a half-day. The simplicity of the method doesn’t compromise flavor or texture; it elevates your experience, blending the beauty of time-honored traditions with the practicality of modern cooking.
Preparation Phase & Tools to Use
Embarking on your bread-baking adventure requires a few key tools that assure success every step of the way.
-
Mixing Bowl: A large, sturdy bowl provides ample space for mixing and kneading the dough without making a mess.
-
Dutch Oven: Essential for creating that perfect crust, the Dutch oven traps steam, giving your bread a beautifully golden exterior while keeping the inside fluffy and moist.
-
Bench Scraper: This handy tool helps manage sticky dough with ease and enables you to shape your loaf neatly.
-
Digital Kitchen Scale: While you might be tempted to use cups, a scale guarantees precise measurements, critical for consistent results.
-
Wire Rack: As your bread cools, allowing air to circulate is vital for achieving that coveted crusty exterior without sogginess.
Preparation tips to enhance your bread-making process include having all your ingredients measured and ready to go, and ensuring your sourdough starter is lively and bubbly before you begin.
Ingredients for No-Bulk-Fermentation Sourdough Bread
-
500g all-purpose flour: Perfect for creating a light and airy texture. For a heartier texture, consider using bread flour or a blend of whole wheat flour.
-
350g water: Use room temperature or warm water to encourage activity in your starter and facilitate the dough development.
-
100g sourdough starter: Your starter should be active and bubbly. If needed, feed your starter a few hours before using it to ensure vitality.
-
10g salt: This ingredient not only enhances flavor but strengthens gluten, contributing to the bread’s structure.
For any dietary needs, feel free to substitute all-purpose flour with gluten-free options, although this might alter the texture slightly.
How to Make No-Bulk-Fermentation Sourdough Bread
-
Mix the Flour and Water: In a large bowl, combine 500g of all-purpose flour with 350g of water. Stir until no dry flour remains. Let the mixture rest for 30 minutes. This autolyse phase allows the flour to absorb water fully, paving the way for a better dough structure.
-
Add Starter and Salt: After resting, incorporate 100g of your active sourdough starter and 10g of salt into the dough. Mix until everything is well combined and the salt has dissolved.
-
Knead the Dough: Transfer the dough to a lightly floured surface. Knead for about 5-10 minutes, working it into a smooth, elastic ball. The dough should feel slightly tacky yet not overly sticky.
-
First Rise: Shape the dough into a ball and place it in a lightly greased bowl. Cover it and let it rise for 1-2 hours, or until you notice a noticeable increase in volume.
-
Preheat Your Oven: Set your oven to 450°F (230°C) and preheat with your empty Dutch oven inside. This step ensures a hot cooking environment, essential for achieving the perfect crust.
-
Transfer to Dutch Oven: Once preheated, carefully remove the hot Dutch oven. Gently place your risen dough inside, cover it, and return the pot to the oven.
-
Bake the Bread: Bake for 30 minutes covered, then remove the lid and continue baking for an additional 15 minutes until the crust is golden brown and offers a fragrant aroma.
-
Cooling Phase: Let your bread cool on a wire rack before slicing. This crucial step allows the crumb to set, ensuring each slice holds together beautifully.
Chef’s Notes & Helpful Tips
-
Make-Ahead Tips: You can mix your dough the night before and allow it to rise in the fridge for a more pronounced sour flavor. Just remember to bring it back to room temperature before baking.
-
Cooking Alternatives: If you don’t have a Dutch oven, consider using a large baking tray with hot water in a separate tray to create steam in your oven.
-
Customization Ideas: Experiment by adding herbs, cheese, or seeds such as sesame or poppy for added flavor and texture. Each addition can create a unique twist that excites your palate.
Common Mistakes to Avoid
-
Over-Kneading: While kneading develops gluten, overworking the dough can lead to a dense loaf. Aim for a smooth, elastic dough without excessive toughness.
-
Skipping the Autolyse Phase: Neglecting this phase could result in a less developed dough. Embrace the time spent to allow flavors to deepen.
-
Underbaking: Ensure your bread meets that ideal golden color and sounds hollow when tapped. Trust your instincts—the crust should have a glorious crunch!
-
Not Using an Active Starter: Always ensure your starter is bubbly and fed before using it. An inactive starter leads to lackluster rise and flavor in your bread.
What to Serve With No-Bulk-Fermentation Sourdough Bread
This delightful bread pairs remarkably well with:
-
Butter and Jam: A classic combination that brings warmth and sweet indulgence.
-
Olive Oil and Balsamic Vinegar: For a rich Italian flair, dip your fresh bread into this tangy mix.
-
Soups: Chunky chili or creamy bisque finds perfect companions in crusty sourdough slices.
-
Charcuterie Platter: Elevate gatherings by pairing this bread with meats, cheeses, and olives, enhancing your culinary experience.
-
Avocado Toast: Toast a slice, spread creamy avocado, and sprinkle sea salt for a tantalizing brunch option.
-
Eggs: Whether poached or scrambled, the bread serves as a delightful base for egg dishes infused with herbs.
-
Grilled Cheese: Create an exquisite panini that melts in your mouth, with every layer showcasing the harmonious bread.
-
Bruschetta: Top the warm slices with garden-fresh tomatoes and basil for a summer-inspired snack bursting with flavor.
Storage & Reheating Instructions
To preserve your delicious bread, store it at room temperature wrapped in a clean kitchen towel for up to three days. For longer storage, freeze slices in an airtight container or freezer bag for up to three months. When you crave a warm slice, simply pop it into a preheated oven at 350°F (175°C) for about 10 minutes, reviving that freshly baked aroma and warmth.
Estimated Nutrition Information
Approximately, one slice of this sourdough bread contains:
- Calories: 120
- Carbohydrates: 24g
- Protein: 4g
- Fat: 0.5g
- Fiber: 1g
Disclaimer: Nutritional values will vary based on specific ingredients used and serving size.
FAQs
-
Can I use whole wheat flour?
Yes, you can substitute whole wheat flour, but it may result in a denser loaf. For best results, blend it with all-purpose flour. -
How can I tell if my sourdough starter is ready to use?
An active starter should double in size within 4-6 hours after feeding and have plenty of bubbles. A tangy aroma is also a good sign. -
What can I do if my dough is too sticky?
Avoid adding too much flour during kneading; instead, let the dough rest for about 10-15 minutes to allow the gluten to relax before continuing. -
Can I mix and match this recipe?
Absolutely! Experiment with different herbs, nuts, or cheese to create variations that suit your taste. -
Is it necessary to use a Dutch oven?
While it’s recommended for optimal crust, you can use any high-heat resistant pot with a lid or bake on a baking stone with steam created from a separate tray of water.
Conclusion
Baking this no-bulk-fermentation sourdough bread not only fills your kitchen with enticing aromas but also creates a warm sense of community around the dining table. Each loaf tells a story of love and patience, rewarding you with the satisfaction of having created something truly wonderful from scratch. Take a moment to relish this experience, and soon, your family and friends will come to cherish your artisan bread—a creation that embodies the essence of homemade goodness. Don’t wait any longer; gather your ingredients and embark on this rewarding journey of bread-making. Your taste buds will thank you!
Print
No-Bulk-Fermentation Sourdough Bread
- Prep Time: 15 minutes
- Cook Time: 45 minutes
- Total Time: 60 minutes
- Yield: 8 servings 1x
- Category: Bread
- Method: Baking
- Cuisine: Homemade
- Diet: Vegetarian
Description
A quick and delicious no-bulk fermentation sourdough bread that offers a tangy flavor and crispy crust without the long wait.
Ingredients
- 500g all-purpose flour
- 350g water
- 100g sourdough starter
- 10g salt
Instructions
- Mix the flour and water in a large bowl, stirring until no dry flour remains. Let it rest for 30 minutes.
- Add the sourdough starter and salt into the dough, mixing until well combined.
- Knead the dough on a lightly floured surface for about 5-10 minutes until smooth and elastic.
- First rise the dough in a greased bowl for 1-2 hours until it has increased in volume.
- Preheat your oven to 450°F (230°C) with a Dutch oven inside.
- Transfer the risen dough into the hot Dutch oven, cover, and bake for 30 minutes.
- Remove the lid and bake for another 15 minutes until golden brown.
- Cool the bread on a wire rack before slicing.
Notes
For a more pronounced sour flavor, mix the dough the night before and refrigerate. If you don’t have a Dutch oven, use a baking tray with a separate tray of hot water to create steam.
Nutrition
- Serving Size: 1 slice
- Calories: 120
- Sugar: 0g
- Sodium: 400mg
- Fat: 0.5g
- Saturated Fat: 0g
- Unsaturated Fat: 0g
- Trans Fat: 0g
- Carbohydrates: 24g
- Fiber: 1g
- Protein: 4g
- Cholesterol: 0mg